Showing posts with label Before and After. Show all posts

Sunday, March 9, 2014

Echo's New Room


At long last Echo's big girl room is complete! This was one of the major things we had to do to get ready for the new baby and we have been planning and talking about it for so long that we are really excited to finally get it done. We plan to put the new baby in the nursery (Echo's old room) because it is right across the hall from us and has easy night time access for me. Echo has been sleeping really well lately making it less important for her to be right next to us so moving her to the other room just made sense. I didn't want them sharing a room at this point because I'm afraid the baby will wake Echo up and don't want to mess with her sleep.  

Before
The biggest thing we had to do in this room was get rid of the nasty carpet (as seen in the before picture). Eric's parents came down last weekend to help us work on it and they knocked the whole thing out in just two days! The new floor looks amazing, it really makes me want to do the rest of the rooms that haven't been done yet but it is a huge pain so who knows when that will happen.


My contribution to the room was a mural by Echo's floor bed. I originally really wanted to do this room in a nautical theme (mostly because I wanted to paint a nautical mural) but I could see that Echo really didn't care about under sea stuff as much as I do so in the end I tried to make it something she would enjoy more. She loves to help me in the garden and loves animals so I did some sunflowers and a rabbit for her. She is so proud of this mural and loves the rabbit in particular. She often goes up to it and pats it or gives it kisses, so cute!


This room feels so much more open and it has been fun watching her get used to it. She spent her first night in her new room last night and she slept great in spite of my worries about her adjusting to a new space.

I'm so happy to have her moved in because now she will have plenty of time to think of this as her room before the baby comes and takes over her old room! We still have a few of her things to move in and Eric is building some shelves in her closet but other than that the room is done. Yay!

Tuesday, December 4, 2012

Exposed Pantry

Finally! A house post again! I bet you thought we'd never have another of those, it's been a while. This whole baby thing has kind of distracted us from working on the house but in our defense she is really cute and it's hard not to spend a lot of time staring at her :-)

We used to have this really awful, deep dark pantry to the left of the fridge. Seriously, it was horrible. You could never find anything in there and we had to keep a flashlight close by to even have a chance of seeing what was inside. So in the spirit of taking out all our cabinets and replacing them with shelves we (ok, mostly Eric) put in an awesome exposed pantry so that we can actually see what we have.


Eric removing the old pantry

ugly, empty space

painted and supports added

Finished!

Finished!

Eric used pine for the shelves and red oak for the vertical beams, the shelves are very solid and fit tons of stuff!


It has freed up so much counter space for us and it's amazing how we can actually see what we have now! It also gives us a nice way to display all the pretty little food canisters we have been collecting. It feels good to be making some progress on the kitchen remodel. Since we spend so much time cooking it's important to have this space be very functional even though it is small. We still have lots of things we want to do in here but this is a huge step in the right direction!

Sunday, February 26, 2012

Kitchen Sink!

Eric's parents came down this weekend and gave us the kick in the pants we needed to finally install our new kitchen sink. We have been hanging on to the thing forever but we were hesitant to start the project because tackling plumbing issues seems scary and overwhelming. Luckily, my father in law Don was happy to help and he and Eric spent the better part of the weekend installing the new sink, faucet and a section of butcher block counter. We still have a lot to do and the kitchen looks like a hot mess right now because of all the unfinished details but oh my gosh, what we do have in place looks gorgeous! I am totally in love with the new fixtures and the countertop, just this little bit is really helping me envision what the kitchen will look like when the whole remodel is done. Here are some pictures before, during and after :-)

Before, Eric had already ripped out the countertop in preparation for the new butcher block

Old Sink

Old faucet

Installing the new sink and butcher block

In progress, the sink has no faucet yet!

After, taa daa! Still kind of in progress since there is now a gap to the left of the sink and we are missing some tiles from the backsplash

The new sink is deeeep!

New faucet, so spiffy! It's fun because it has a normal mode and a sprayer mode and it's all flexible and easy to move around.

Another after shot, now I have to get on painting the rest of the cabinets!
 For the counter to the left of the sink we are thinking of using tile so that we have a safe place to set hot pans and an area that won't matter if it gets too wet so we can dry dishes and things over there. We're still figuring this one out but it is sure to be exciting! Right now I am just loving the new sink, washing dishes has never been so fun ;-)

Friday, September 16, 2011

Guest Bathroom Mini Makeover

This week I spent some time working on the refinishing the cabinets in our guest bathroom. The idea was that I would practice on something small scale before tackling the kitchen cabinets later this year. The cabinets were in pretty bad shape in terms of their finish but they are still good, solid maple cabinets. Well it was a lot of working doing all that sanding and staining but it really gave the bathroom a facelift. Here are some pictures.

Before picture, the cabinets were stained a darker color and were pretty scratched up, they also had outdated brass hardware.


here they have been sanded but not yet stained

after, much lighter and it's nice to see the natural wood grain more

also got some shiny new hardware

and to top it off, a new hand towel my mother in law bought for me and a new outlet cover to match the hardware.
It's amazing how small changes can really transform a space! I love the feeling of having accomplished something on the house :-)

Tuesday, May 31, 2011

Before and After

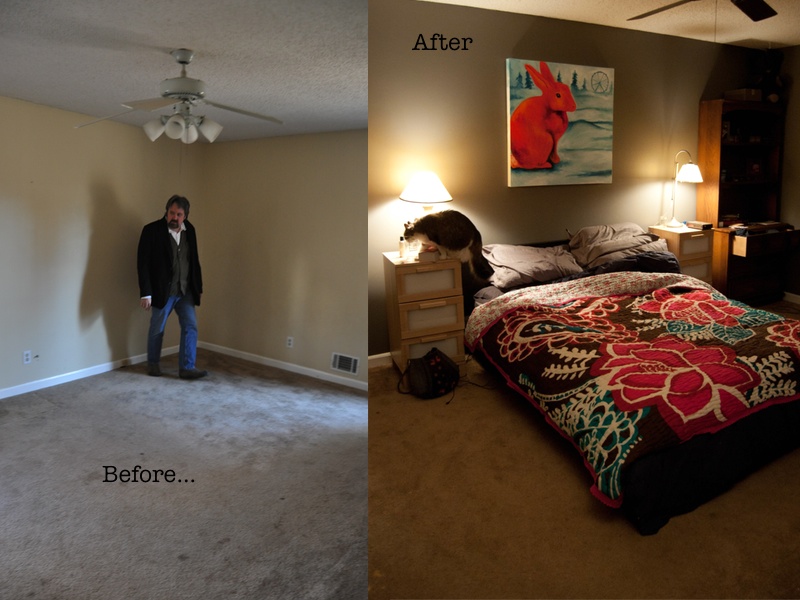
I am finally getting around to posting some side by side comparison pictures, I've been meaning to do this for a long long time so here they are :-) It makes me feel really proud to see how far we've come. Of course there will never really be an "after" because we will be working on the house and improving it constantly as the years go by, this is just the first round of renovations.

hall bathroom

master bedroom

den/loft

dining room

guest bedroom, somehow I don't have a before picture of this

kitchen

living room, my favorite :-)

studio

Saturday, January 8, 2011

Dresser Redo

Things are moving right along in the buying process for our new house. We turned in all our loan paperwork this week and hope to have all of that resolved and the loan in place very soon. We also recently found out that the appraisal went very well so we are good to go on purchasing home owners insurance. This is all great news as we are slowly getting closer and closer to our closing date.

Here is a little before and after post about a dresser that was a hand me down from my parents. I don't remember where it originally came from, I just know that it was used when we got it and that it used to belong to my brother. It's a cute little dresser but badly needed a fresh coat of paint and some updated hardware and I finally got around to making some changes to it this weekend.

Before picture of the dresser, it's a little dinged up and pretty horribly cluttered on top too.

Before detail of the old hardware.

When deciding how to redo the dresser I kept in mind the color scheme and style that Eric and I have been talking about for the bedroom in our new house. As I mentioned before, my current color fascination is for everything gray. We have decided that we want to paint the master bedroom in the new house dark gray and the adjoining bathroom light gray. We want the new bedroom to be different shades of blue and gray with some red elements as an accent color. With all this in mind I decided to paint the dresser a light gray color and add some red accent pieces to it. Here is the result...

After- painted a light gray and updated hardware.

I silk screened a red gazelle on the top of the dresser to add some interest. The gazelle image was inspired by art deco motifs depicting gazelles.

Detail of the new hardware.

Newly organized drawer, it will never be this nice again ;-)
This drawer reorganization was inspired by a post from apartment therapy 5 Tips for Organizizing Dresser Drawers

After picture, back in it's original space and de-cluttered a bit.


As with any project, the cats couldn't resist the urge to be a part of it. I ended up with little gray paw prints all over the floor and this cute picture of Reese "helping".


Hopefully I will have some news on the house buying front next week. Until then I will just keep posting about my interior decorating/design ideas and how they relate to the new house :-)